Review: Nair Cire Divine Wax

*Sent for Review

Overview:

Was not effective at removing my unwanted hair.

Price:

This was given to me by the ChickAdvisor Product Review Club, I’m not too sure what the retail price is.

Rating:

3 / 10

Would I Buy Again?

No

Rambling Review

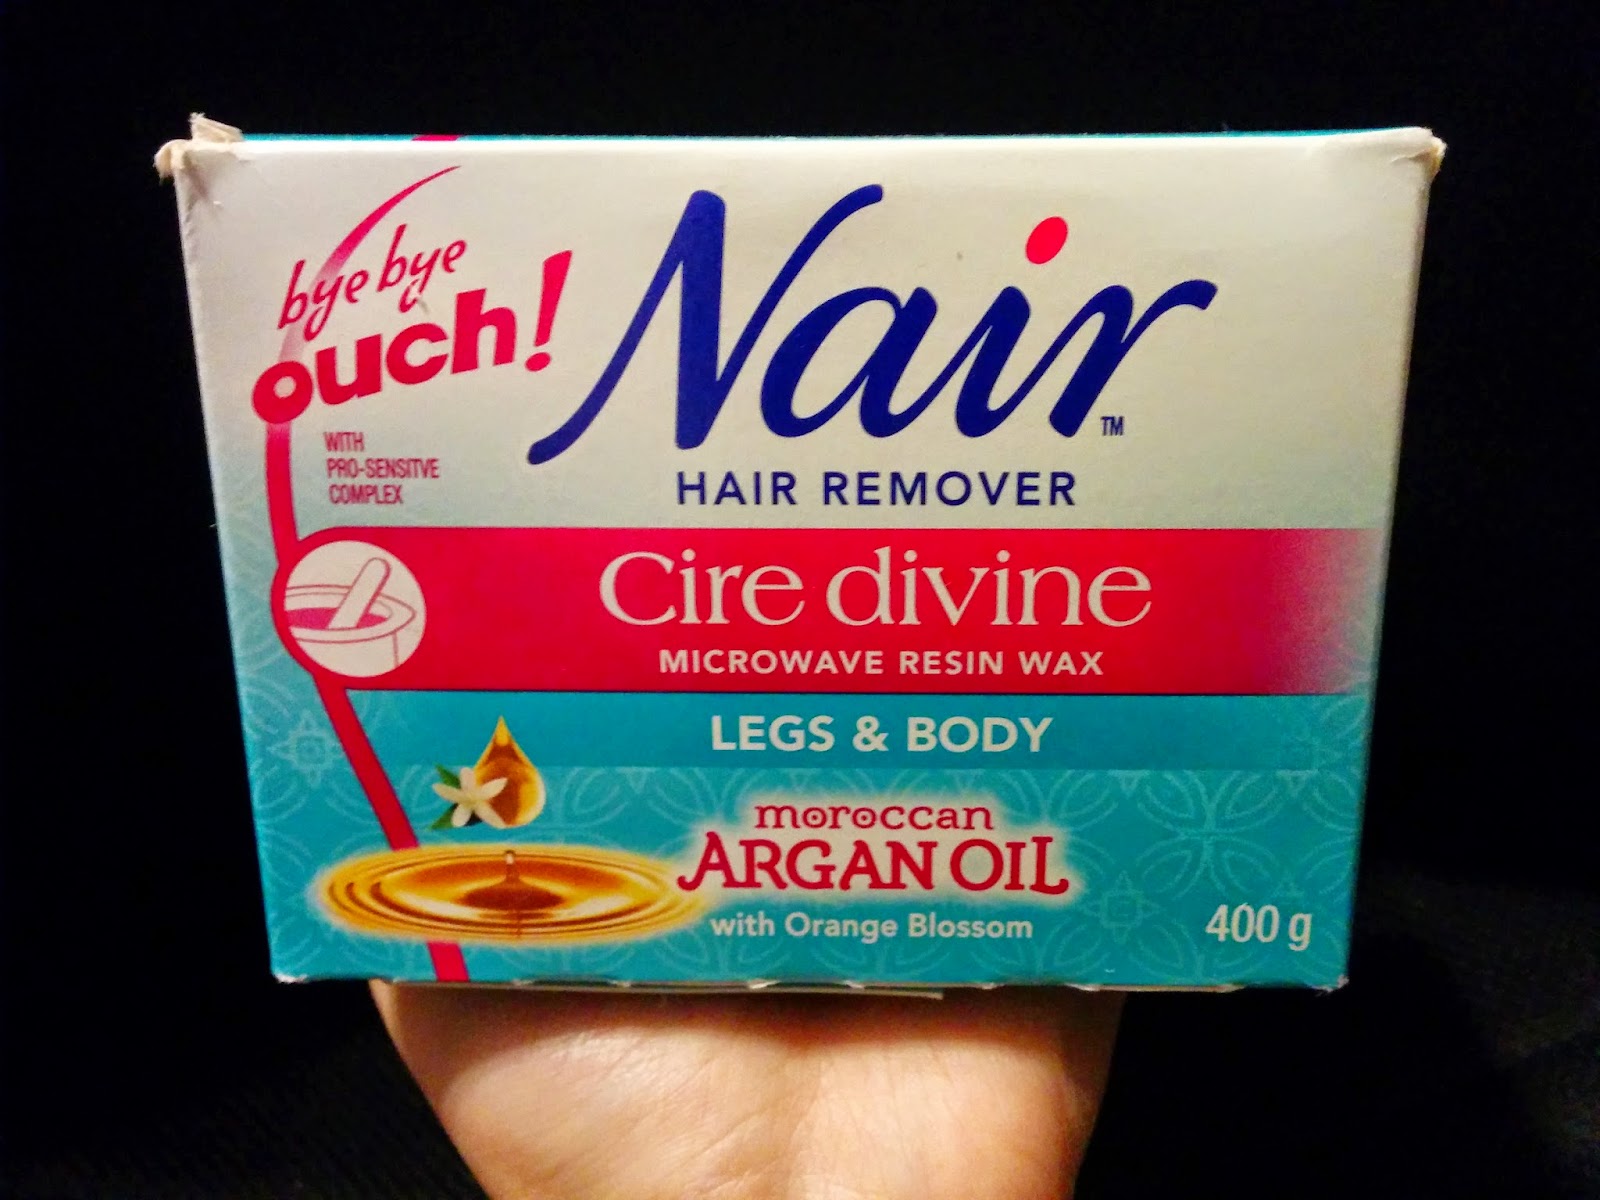
All I can say is that unfortunately, this did not hit the mark for me. I have tried other Nair products, one being their Candy Apple Sugar Wax I reviewed through ChickAdvisor as well. I guess I can start this review by saying that I am no expert at hair removal, but I have definitely been around the block and tried many methods (shaving, cold wax, warm wax, etc).

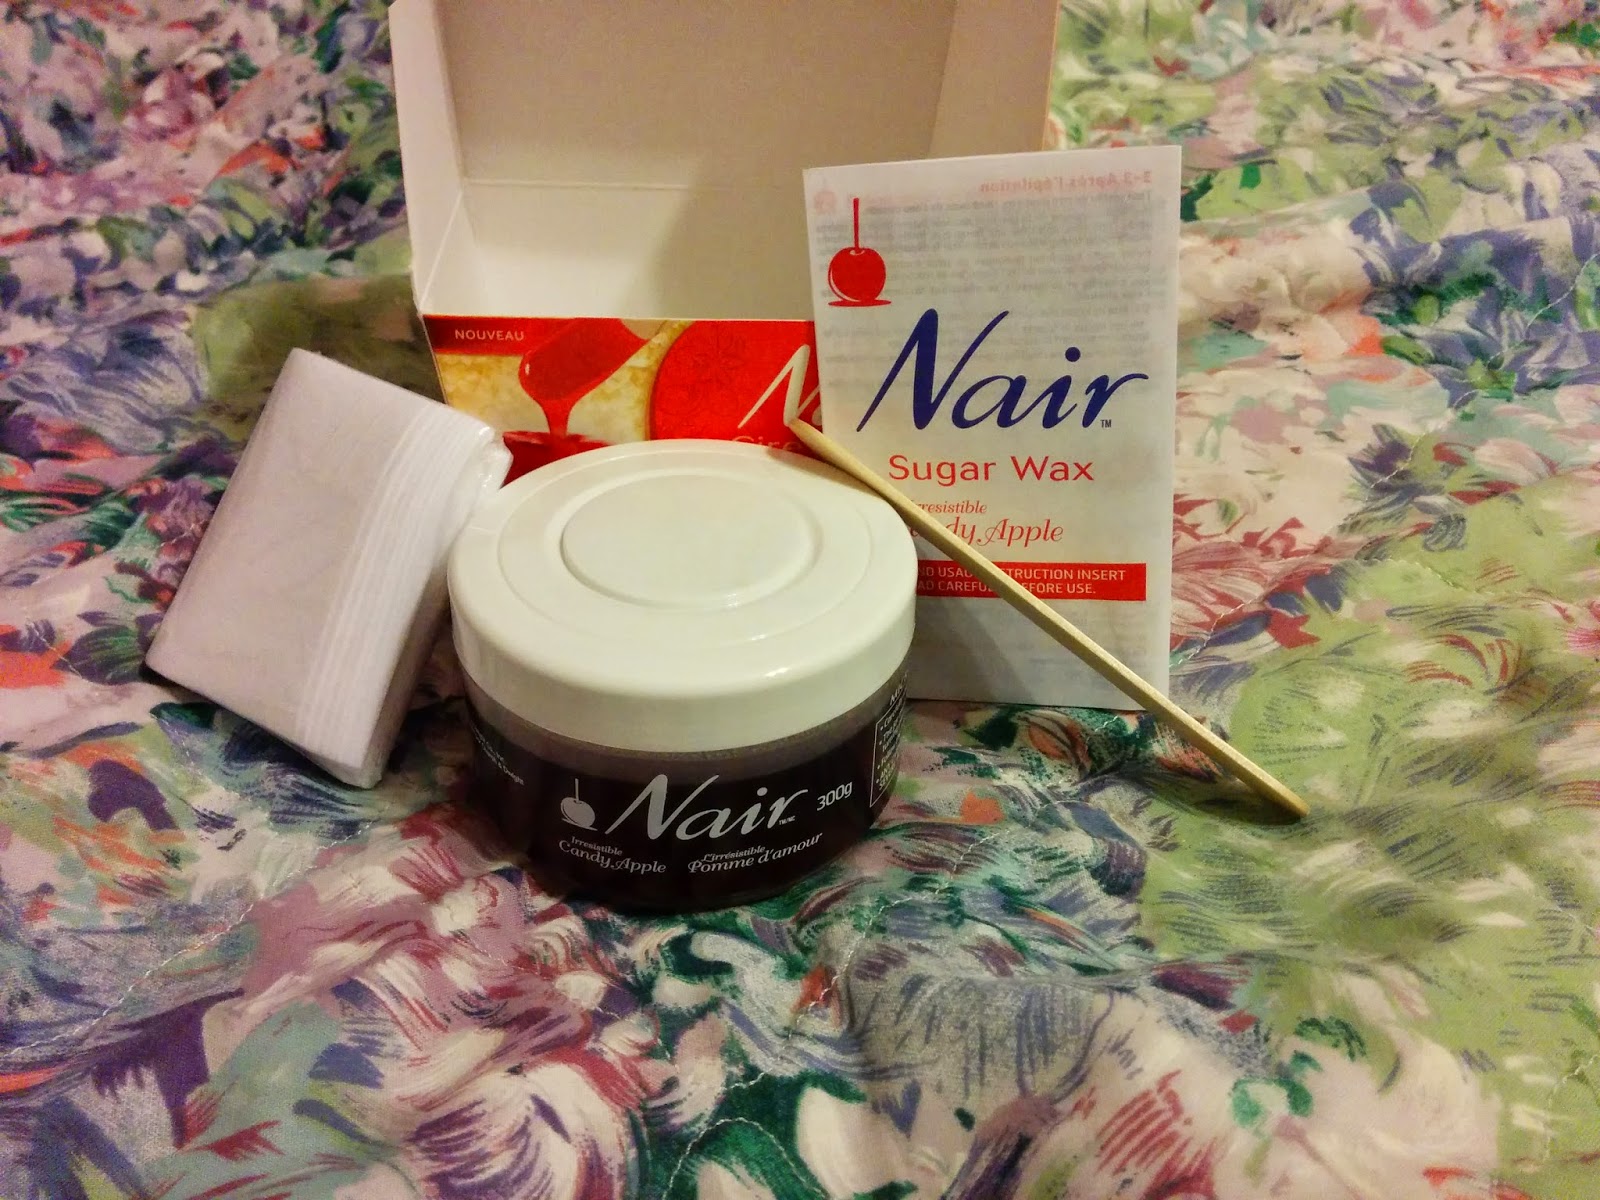
When opening the package, the first thing I noticed was that the wax did not have a top! We were told by ChickAdvisor the reason for this was because Nair is looking to eliminate waste. Good on them for sure, the only concerns I have would be to ensure that the product can’t be tampered with in anyway. A good seal on the box would probably do the job.

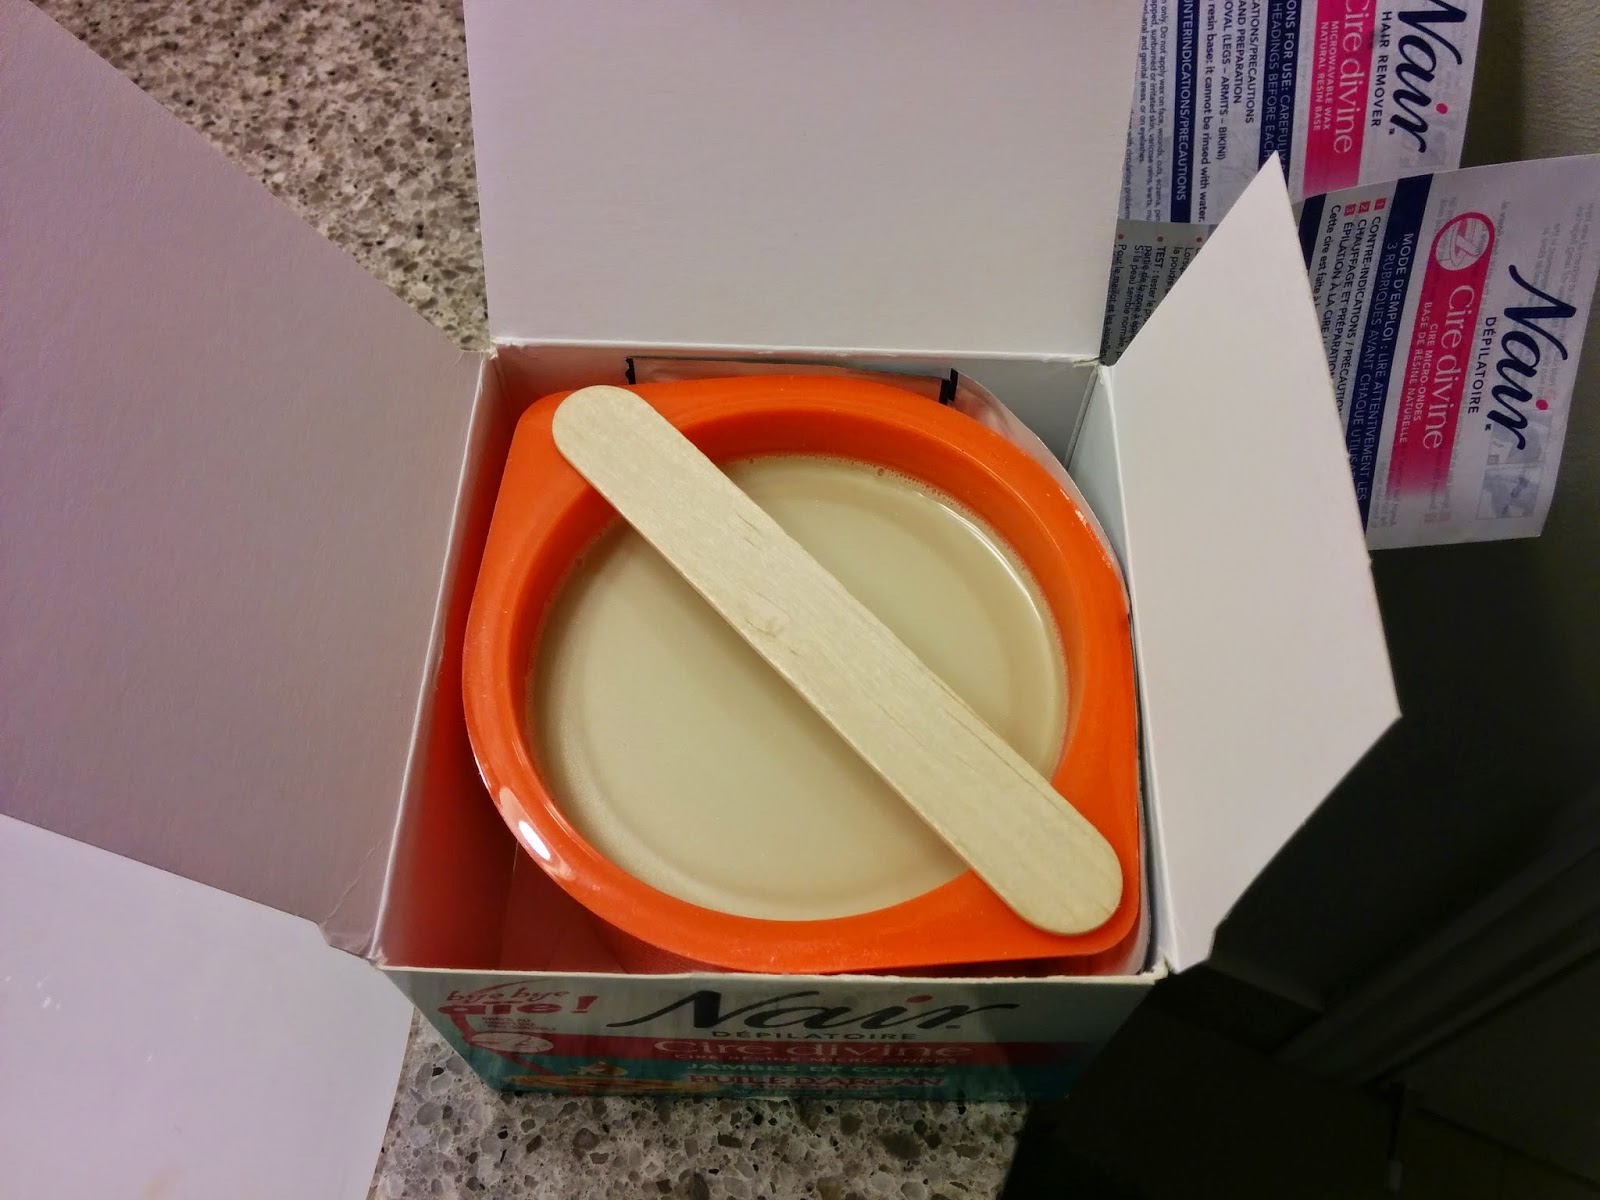
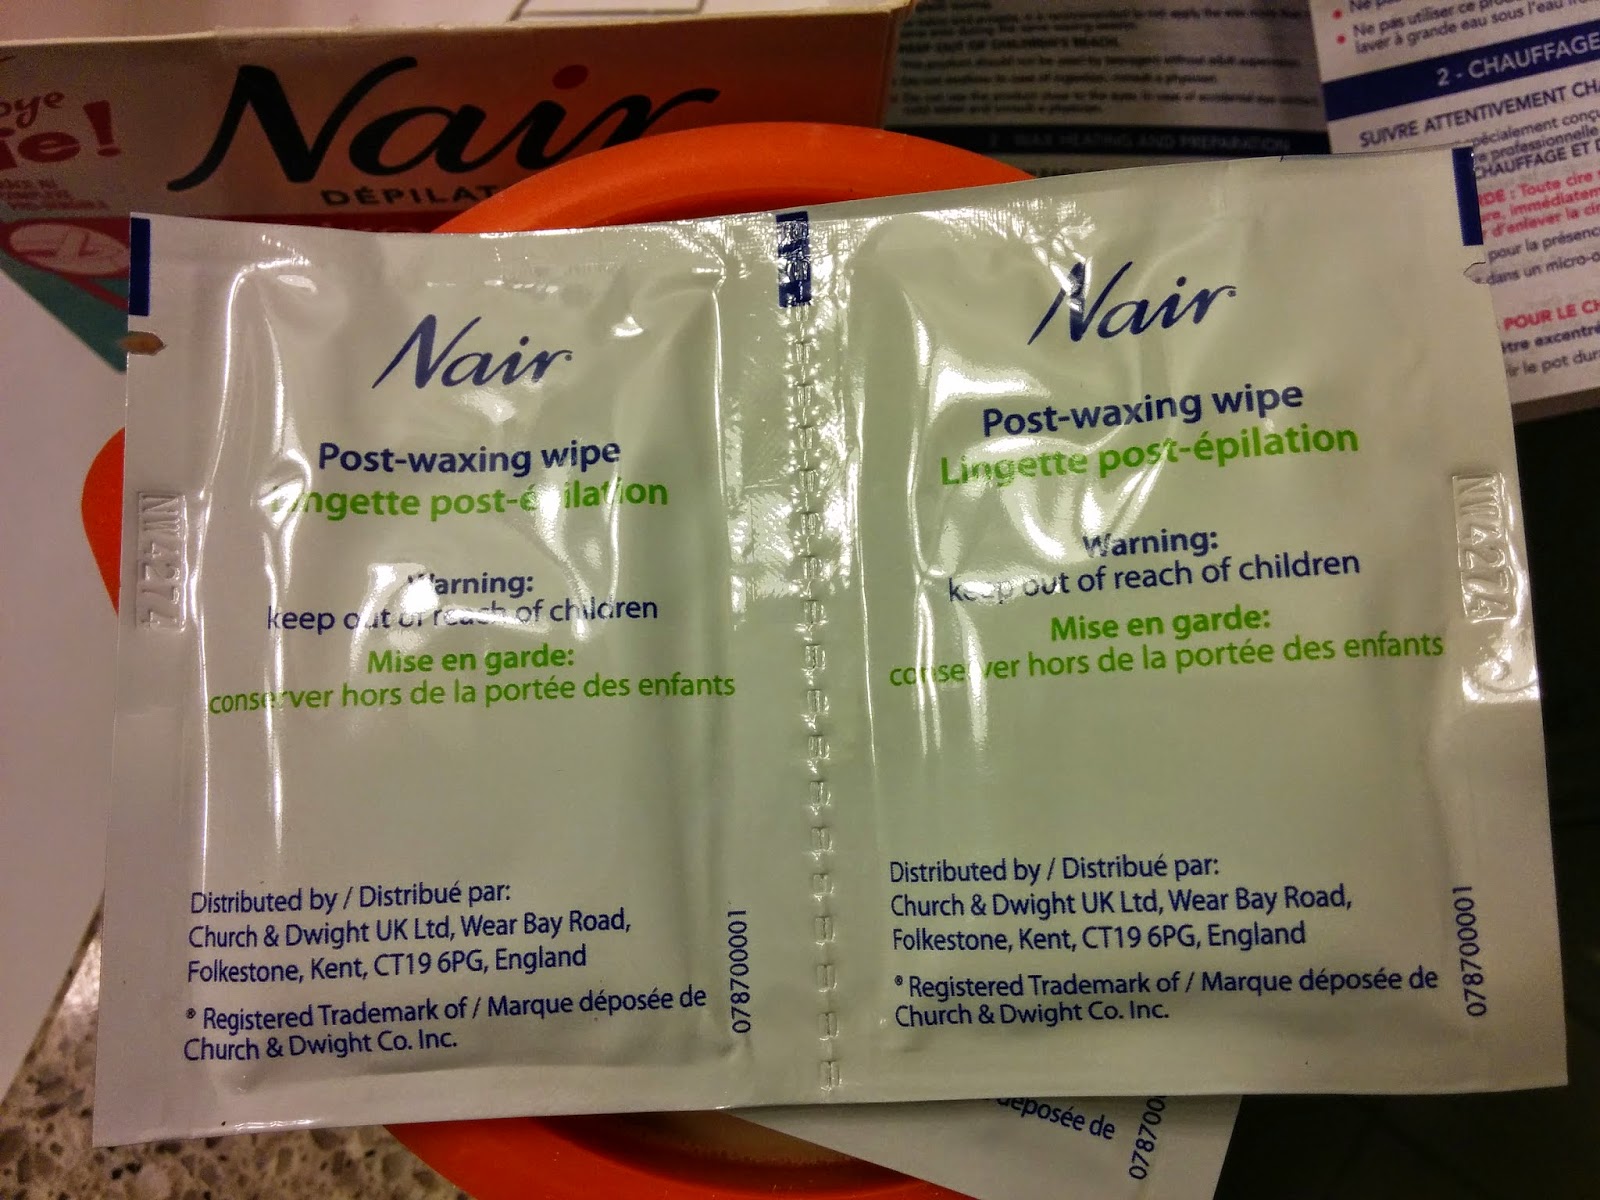
The kit comes with a wooden stick, 3 post waxing wipes, the wax, and an instruction booklet. I was very pleasantly surprised that the instruction booklet had a lot of details. It gave lots of tips, tricks, recommendations. It seems a bit overwhelming, but trust me, the more the merrier when it comes to this stuff!

What I also noticed when opening the box was a lack of fabric cloths used to remove the wax! I was quite happy with this, as it removes one more unwanted step of washing the clothes for the next time. This wax is to be applied directly to the skin and then can be removed after it dries for a bit.

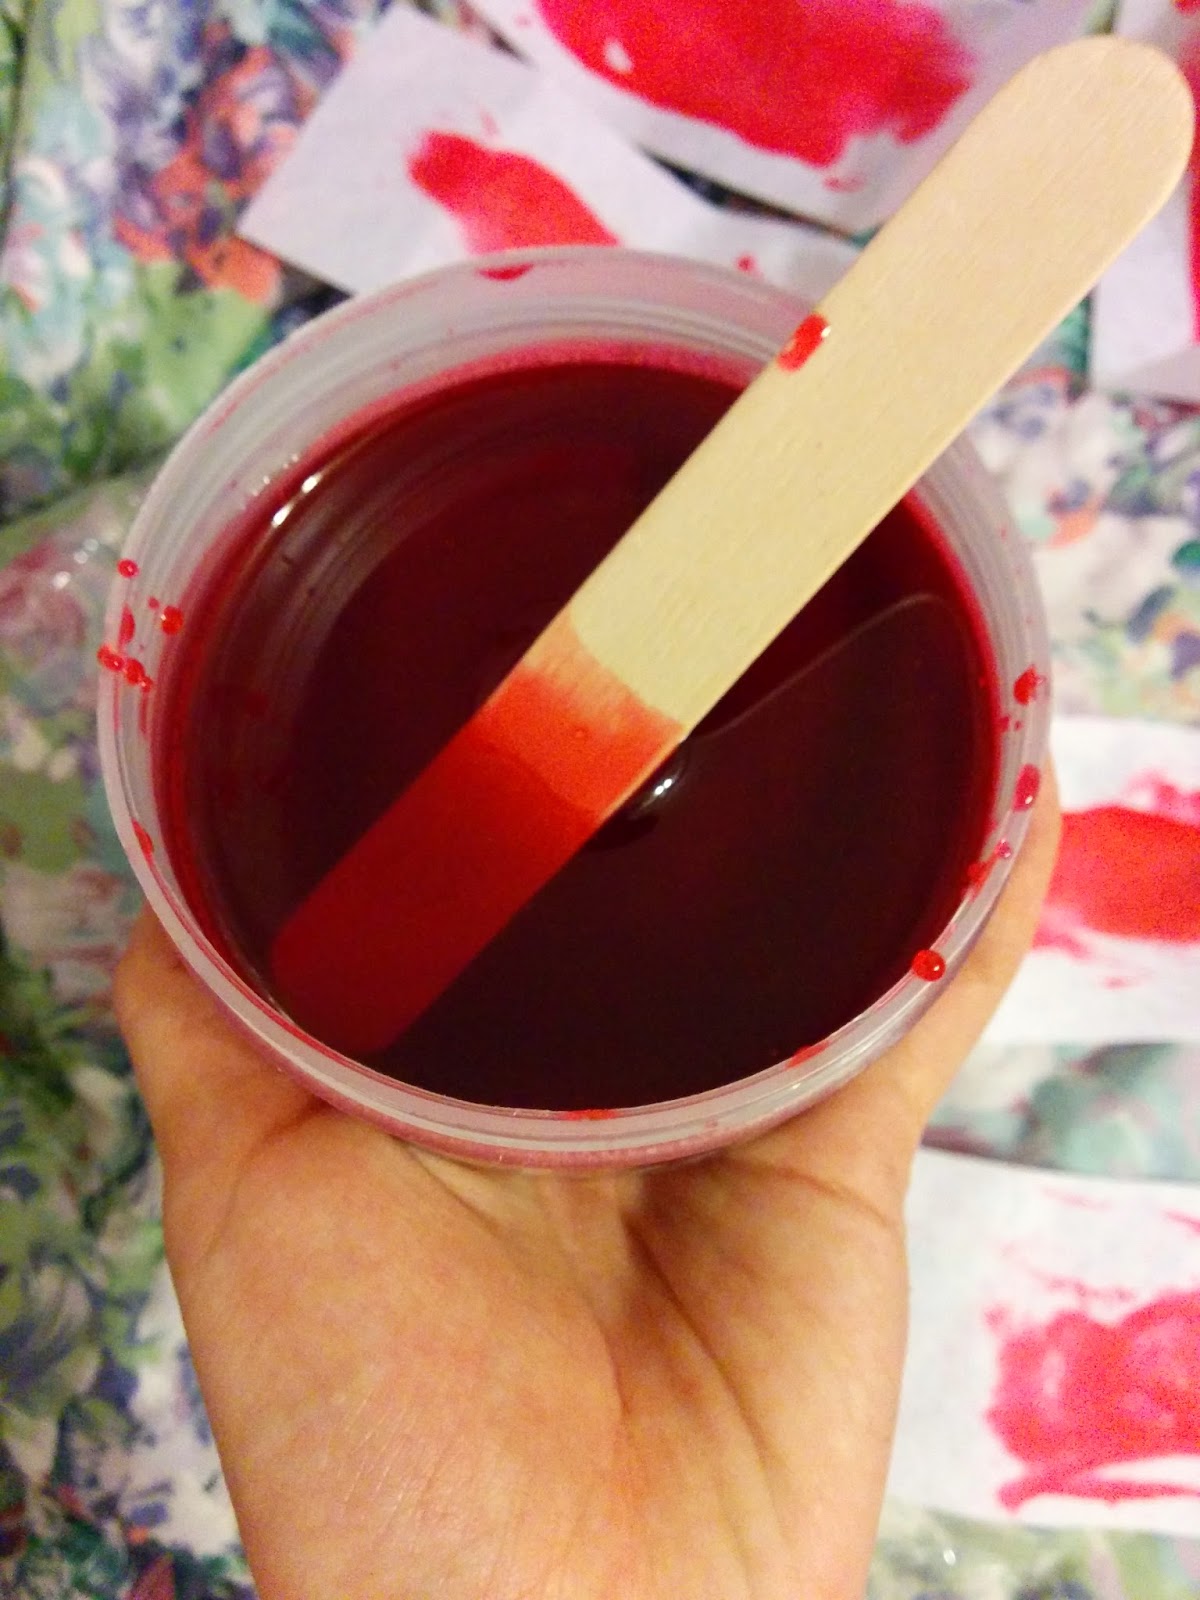
I started to notice issues with this product when I began to heat it up. I followed the heating instructions to a T, but after the first heating round, the wax was very very solid still.

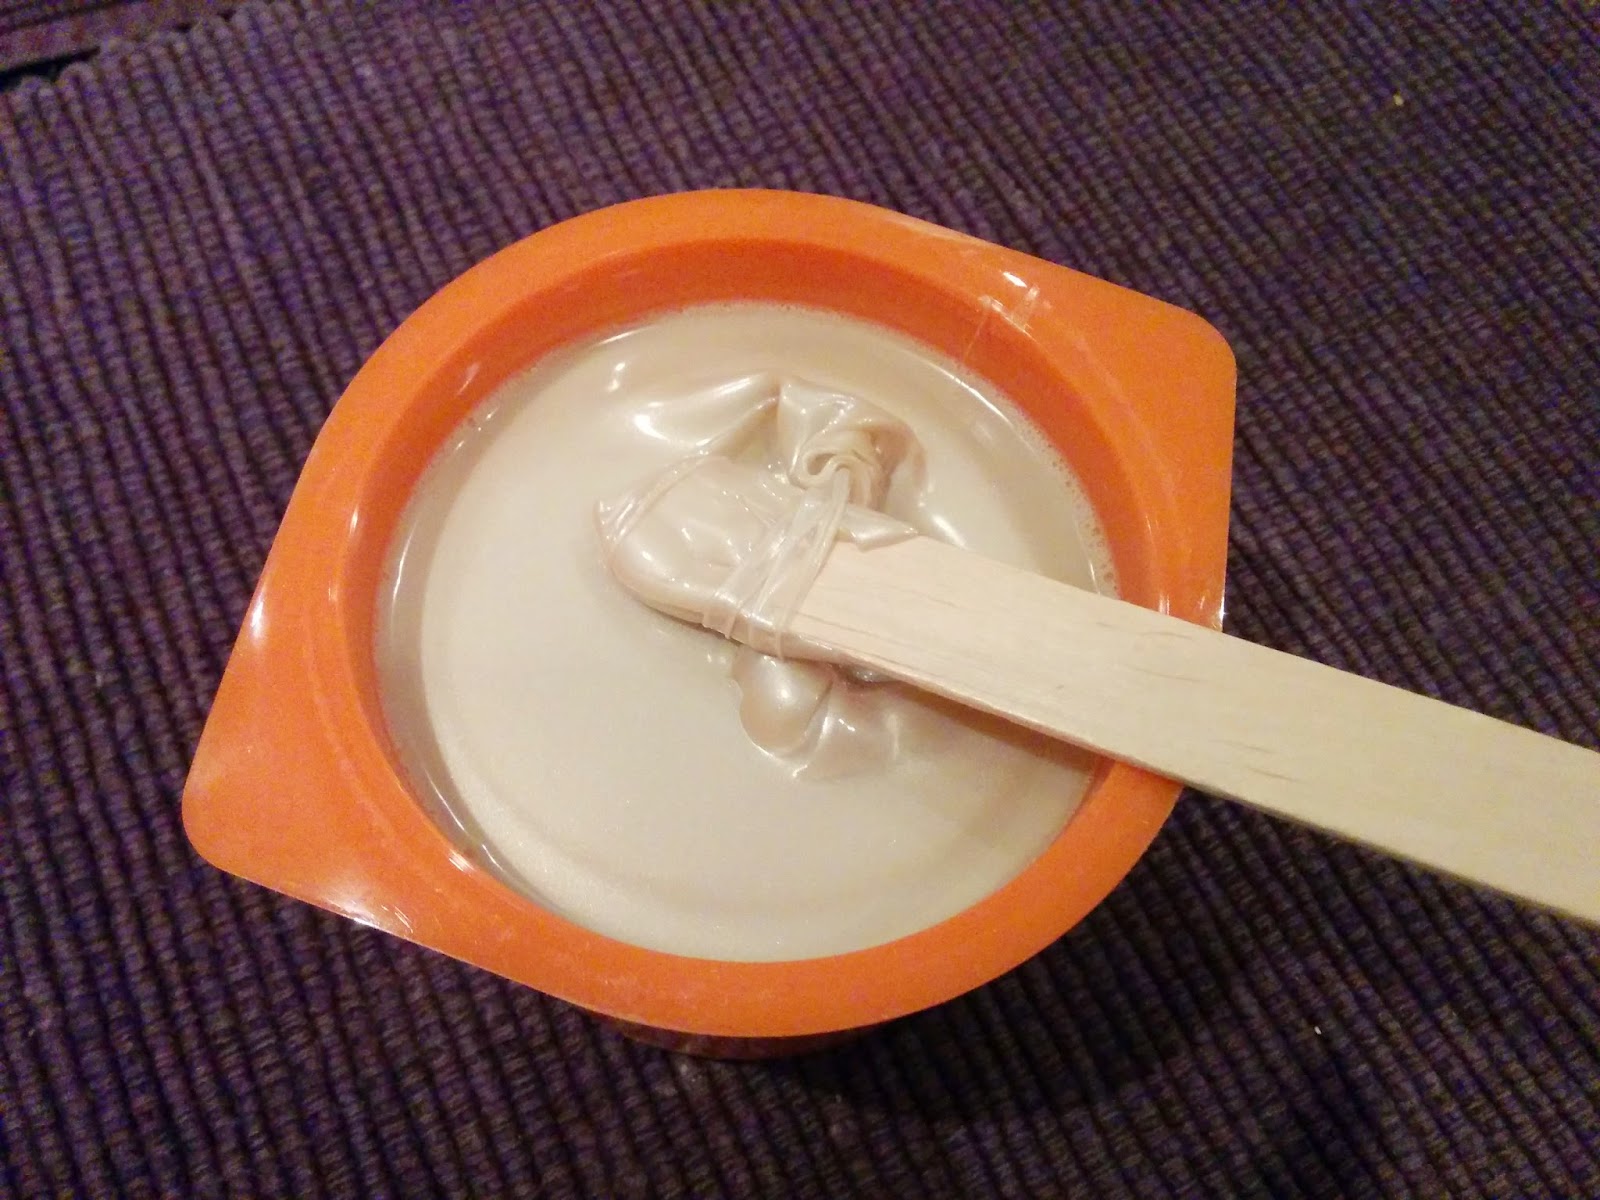
I continued to follow the instructions to get a “creamy honey” consistency, but it unfortunately never came. The instructions list that after the first heating round, heat in 10 second increments until desired. I had to do 6 10 second increments (a full extra minute), until I was able to get a some-what workable consistency. The instructions listed that if bubbles appeared at the top, the wax was heated for too long. I do not think I would have been able to get a workable consistency any other way though.

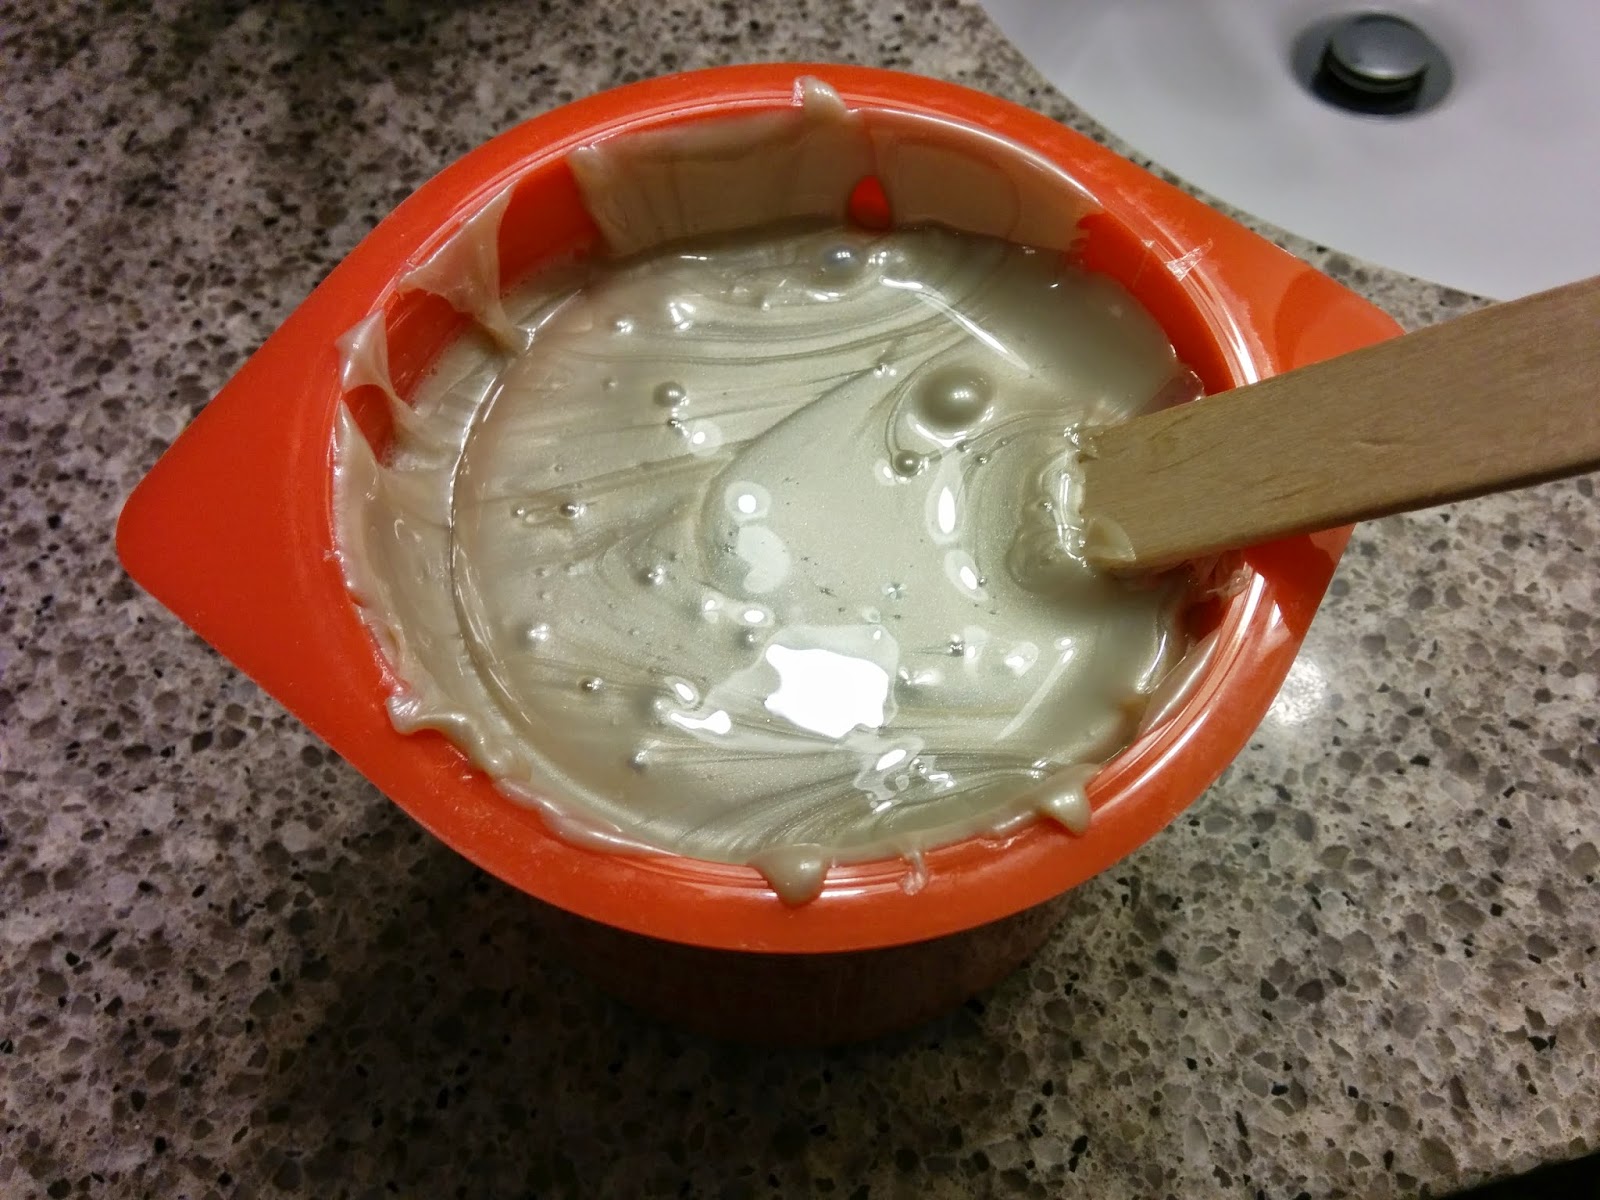
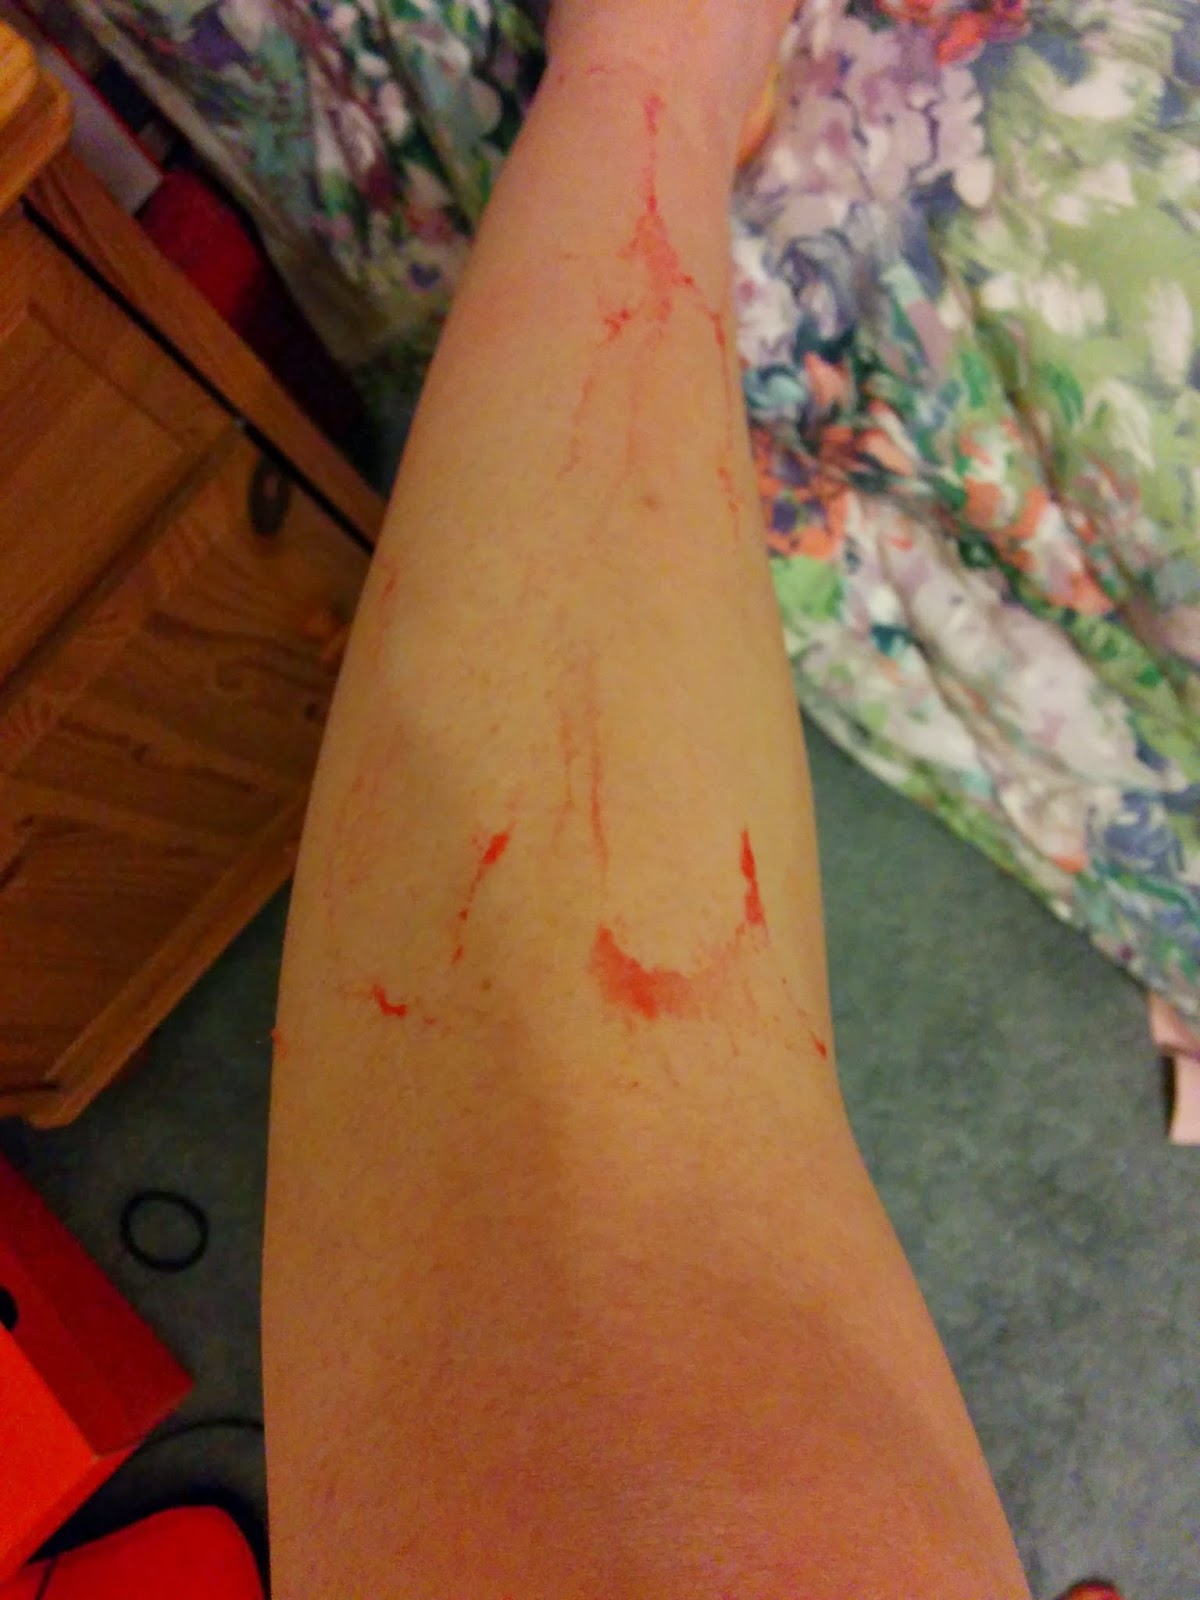
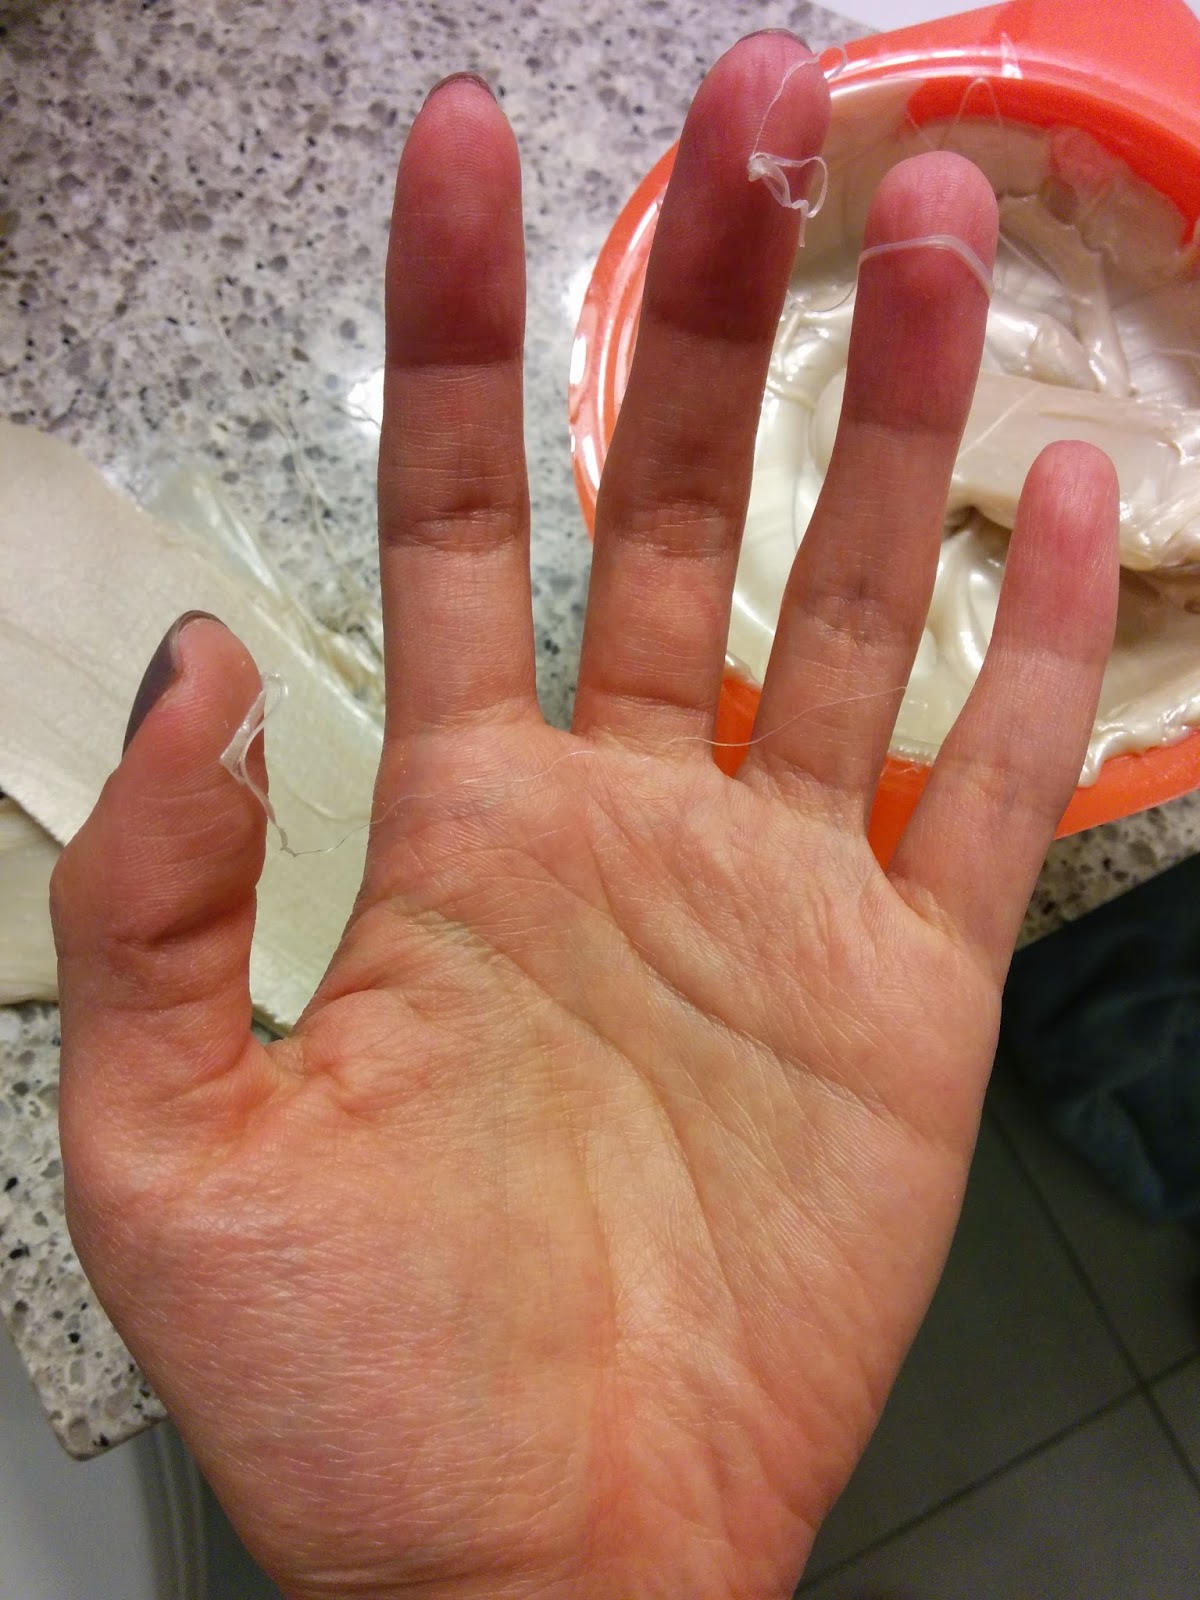
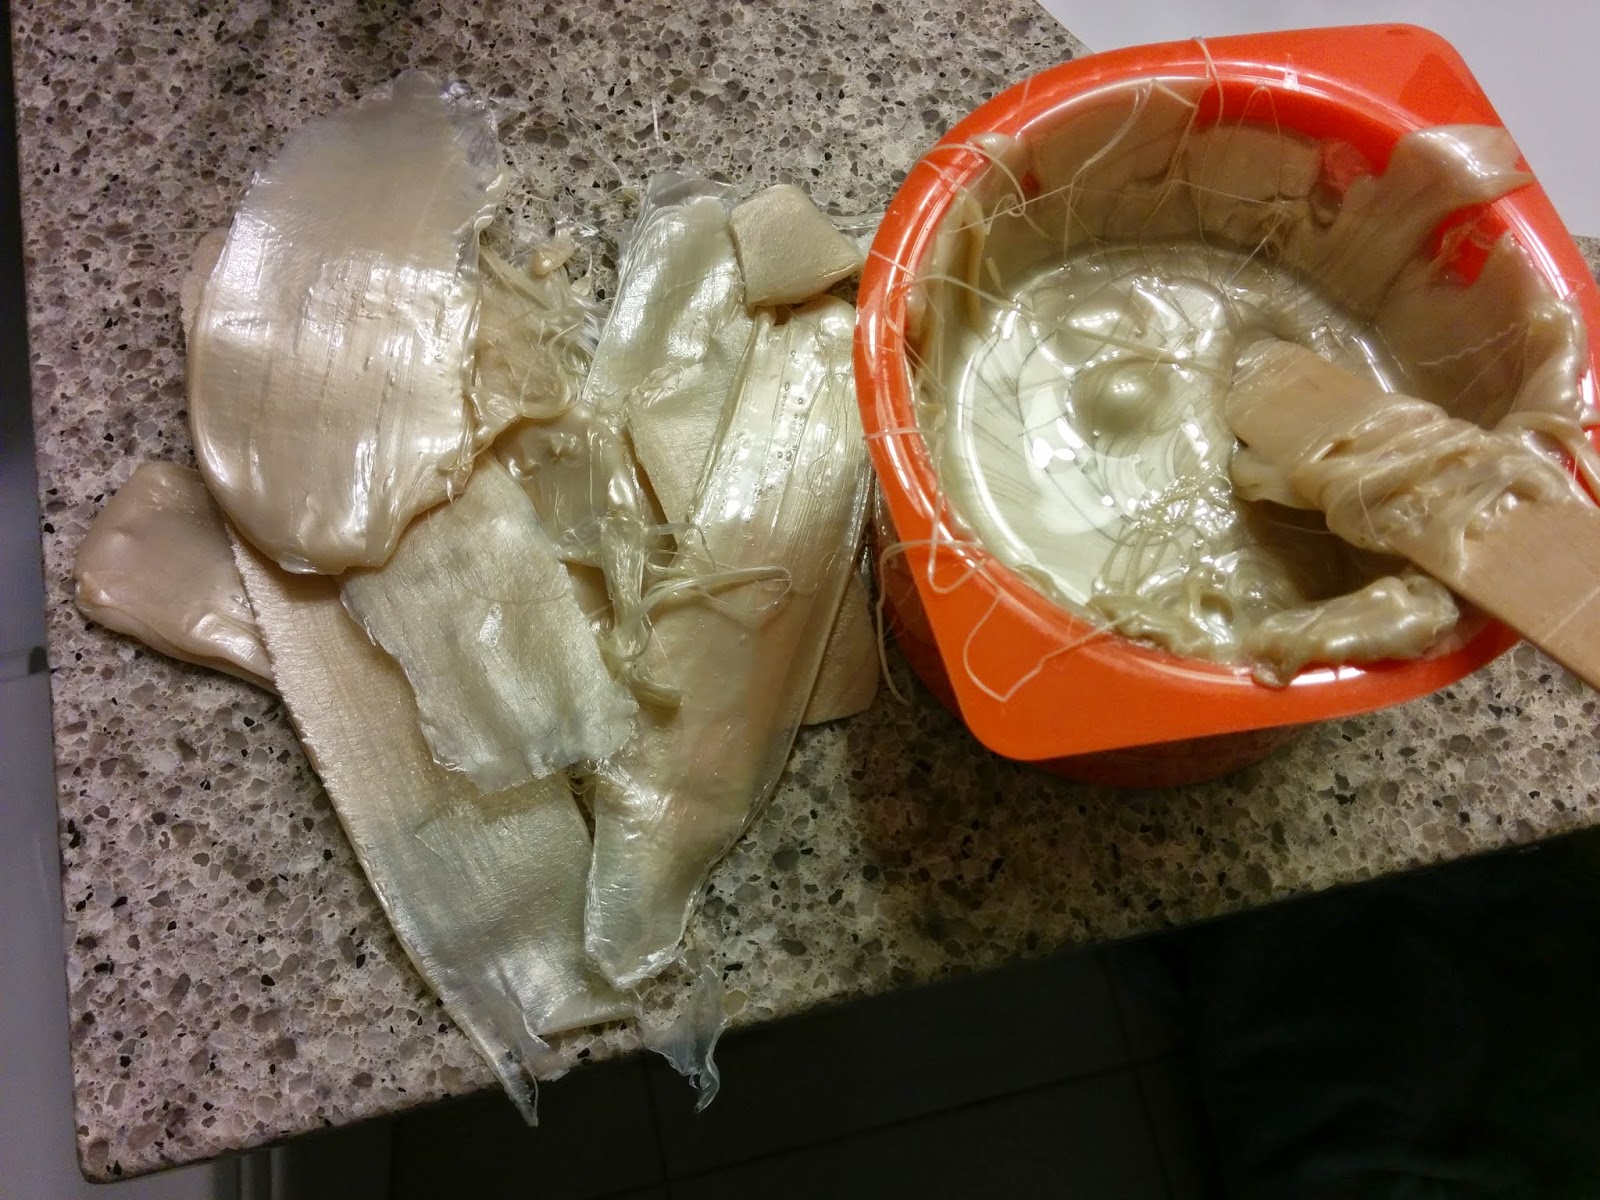
After stirring the wax, I still noticed that the consistency was an issue. It was no where near smooth, but I thought I should just dive right in and try it out. The wax was a bit of a struggle to get a thin layer on the skin. Since the wax came out so thick, the wooden stick did little to help spread it out. After applying and removing the wax in a fast motion, I noticed no hair was removed. After a couple of times, I noticed that actually if I peeled the wax back very slowly, it did remove the hair. This was not the most pleasant of experiences though. What I can equate it to is peeling off a nose pore strip.

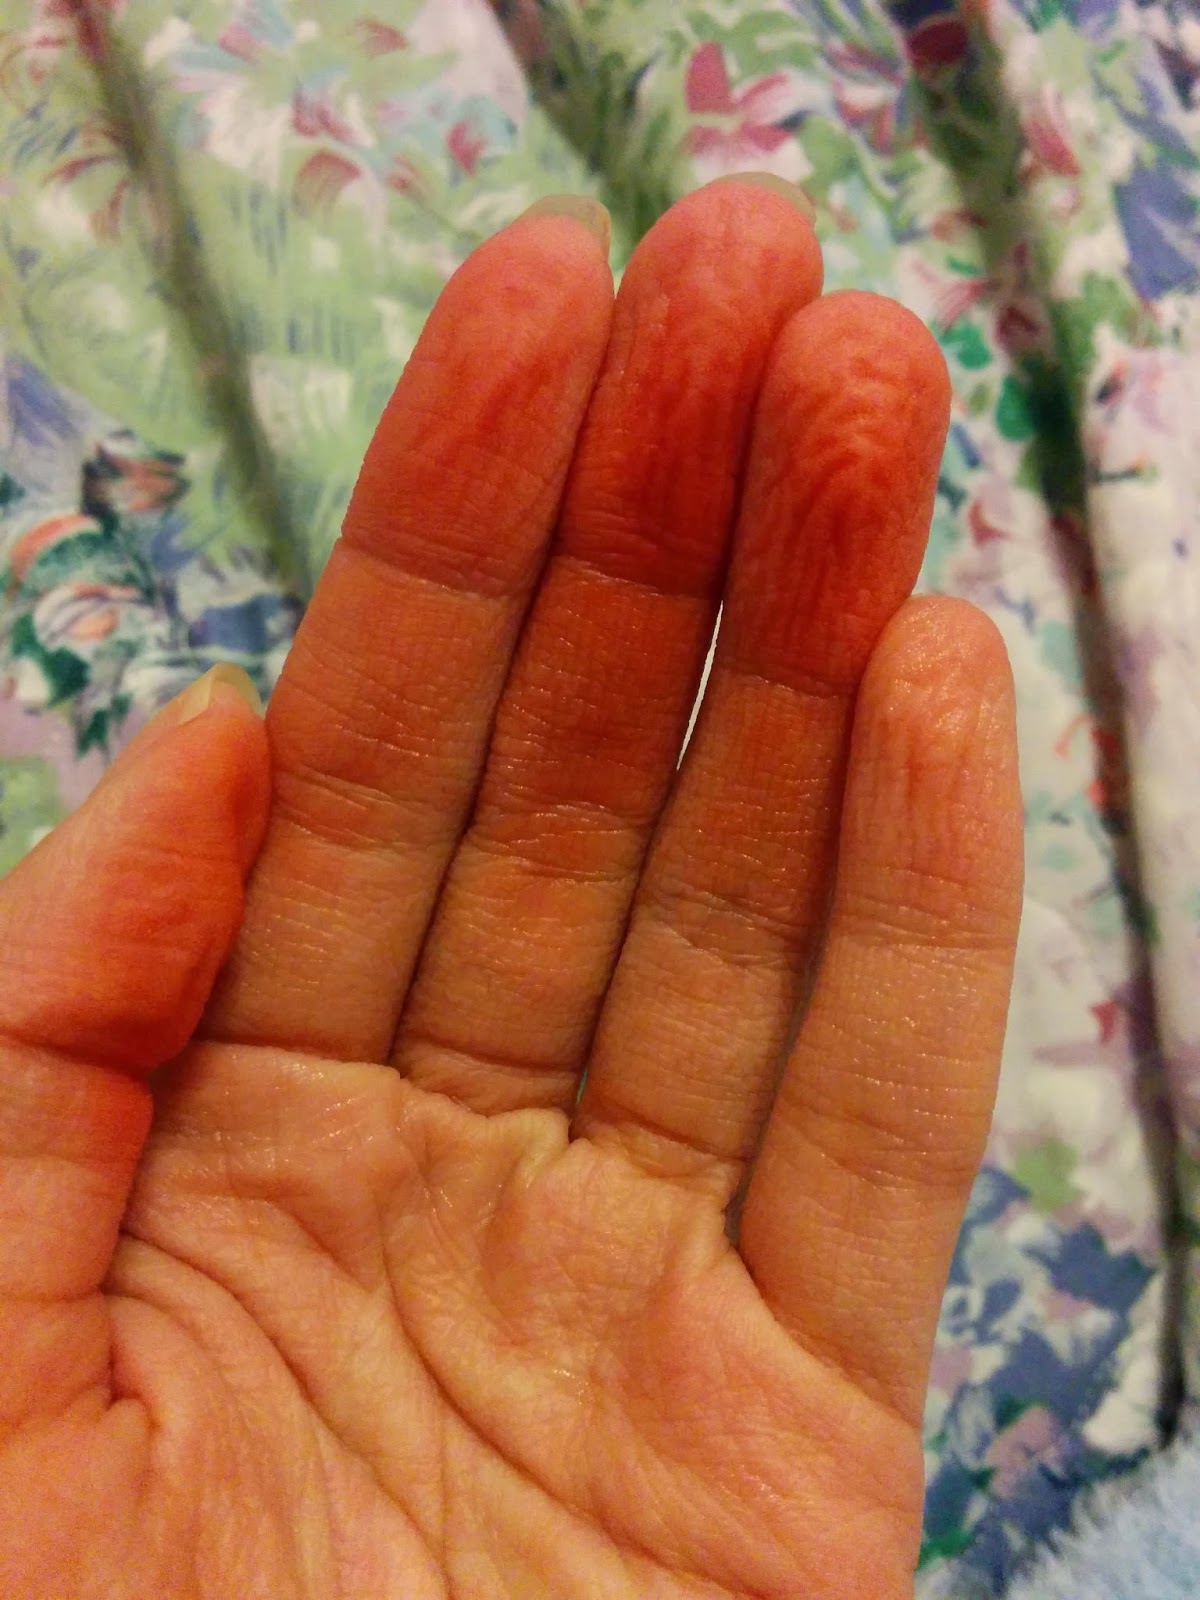
I also noticed it was pretty messy. The wax did not come out of the jar on the stick cleanly, but left very long strands which were hard to contain. I can say that once the wax was left to dry, it was very easy to remove from fingers and counter tops.

It’s sad that this product didn’t work out for me. I’ve tried and loved many Nair wax products, but this one did not work out as expected. I wasn’t able to see any noticeable results. One thing I can say is that the smell was quite pleasant. It’s probably one of the nicest smells from a wax product I’ve experienced.

I hope this review was helpful! From looking at the other ChickAdvisor reviews here, it seems that my experience was an anomaly as many people seem to have had good experiences.

I just want to iterate again that I can only speak on my experience! 😀

Thanks very much for reading, I hope you have a wonderful day!

Follow on Bloglovin

Continue Reading

Review: E2 Elements Squared Hair Care

*Gift/Sent for Review

Hi there! 🙂 This post is a long time coming! Back in December, Whitney from Macarons and Mischief (she is so lovely, please check her out!) held a contest and I won! The prize included a personalized set of Shampoo, Conditioner, and Leave-in Treatment from Elements Squared. After asking E2 if it was okay to talk about their products on my blog, they included a mini set of their shampoos to mix and play around with to create my own shampoo!

Brand Background

Before going into the product, let me expand a bit on the brand. E2 is based in Vancouver, Canada. The company was created after it was seen that the current hair care selection was lacking. Their mission presented on their website is:

Elements Squared Products Inc. aims to enhance natural beauty through our company’s philosophy of using the best natural ingredients to formulate products that are personalized to supplement every client’s needs. Currently we have used this philosophy to develop a revolutionary hair care system that is designed for hair professionals to personalize for you.

The hair care line is to be used by salons which are able to assess your hair situation and then mix  accordingly. In terms of shampoo, there are 5 different bases: Detox Fire, Shiny Metal, Flexible Wood, Volume Earth, and Moisture Water.

Depending on how these bases are mixed, the end result is a personalized hair care solution. Their products are vegan, not tested on animals, gluten free, and pH balanced. See below for the full list.

Reviews

I was able to tell the people at E2 a bit more about my hair and they mixed me up a few special concoctions. 🙂 The main concerns I have about my hair is the frizz. It’s almost come to the point where I’ve accepted it as a fact of life. It’s just always there. So what surprised me the most about this hair care system was that it worked! I have not tried anything that has been able to tame my frizz better. I wouldn’t say it’s 100% gone, but MUCH better than it once was. This is not all these do. It keeps my hair light and cleans very well. You have to shake the bottles before use to ensure that all of the components are evenly distributed which was not an issue at all. I noticed that the shampoo and conditioner were a lot more liquidy then I’m used to. This as well is not an issue.

The mixture I created on my own at home (with some help from E2!) was a clarifying shampoo. I wanted something that cleaned well and removed the oil buildup. I mixed Detox Fire, Moisture Water, and Flexible Wood. I was very impressed with the results! Even though I am by no means a hair expert, I was able to create something that really worked.

After shampooing and conditioning as normal, I was also given a bottle of their Star Treatment

It is a leave-in conditioner that can be used in wet or dry hair. To tell you the truth, since using this hair care system since about late January, I have never needed to use it dry. I use it right after I rinse my hair and it works wonderfully.

One thing I did notice is that all of these products work a bit better if heat is applied. The times I used a hair drier helped leave my hair super smooth, and light.

All in all, I’m so glad that I won Whitney’s contest. I was able to experience one of the best hair care systems I’ve used. The only down side is that since I’m not in Vancouver, I have no access to it anymore. D: It will be very sad when these are empty!!

Hope you have a wonderful day and thanks for reading!

Follow on Bloglovin

Continue Reading

My Z Palette + Inglot Eye Shadow Review

*Purchased

Hello, hello! I wanted to start this blog by saying Happy Valentines Day! Even when single, I never understood the hatred that some have for the day. To each their own I guess. I understand that love should be shown all days of the year, but I still like the idea of Valentines Day. 🙂 Maybe I just like holidays in general.

Anyways, I also wanted to say sorry for the lack of posts. In all honesty I’ve just been a combination of busy/lazy (more of the latter). I haven’t been able to read any blogs either! Hope to catch up on my bloglovin’ blog roll eventually as well.

In this post, I will be doing an overview of my Z- palette and a review of 5 Inglot shadows I picked up. If you didn’t see it, I had to return the Tartelette palette (which can be read about here) and decided to build my own palette.

Z- Palette

For those that don’t know what a Z palette is, it’s a cardboard palette where you can hold individual shadows, blushes, etc. It has magnetic properties in the palette which allow the shadows to stick. I researched a lot before buying this one. You can buy many different types of z-palettes online, or other palettes like the MAC and Make Up For Ever ones. I bought this one from Sephora, as seen by the design. The one thing I can comment on is that it was pretty expensive. This was the biggest size that Sephora sells and it was $35 dollars. You can get Z palettes online for cheaper, but I had a gift card for Sephora so it was worth it for me. The kit also comes with de-potting supplies to help you remove products that are already in a palette. I haven’t used them yet so I can’t comment.

In my palette right now, I have my 5 Inglot shadows and a Benefit Coralista blush. My boyfriend got me the Benefit Advent Calendar 2 Christmases ago and it came with sample products like this blush. I didn’t need to de-pot the blush because it came in a cheap plastic cover which I was able to rip (hulk power!).

Overall:

  • Great way to cut down on clutter
  • Easy to see all your shadows in one area
  • I like that it has a clear cover to see in
  • Has more than enough room for my makeup needs
  • A bit on the pricey side compared to online, MAC or MUFE palettes

Inglot Shadows

 330-337-397-344-329

Now on to the review of a couple of shadows I bought. I’m gonna just make these quick bullet points, cause I know you wanna move on with your life and such.

#330

  • A matte beige colour
  • A good lid colour
  • Could be used as a highlight on brow bone or even maybe on cheeks?
  • A bit of fallout noticed


#337

  • A taupey brown colour
  • My least favourite colour
  • Not as opaque as expected
  • Takes a lot to build up
  • Noticed some fallout when swishing my brush around


#397

  • A peachy gold shimmery colour
  • Looks awesome as an overall lid colour
  • Very very pretty on the eye and my favourite shadow of the bunch


#344

  • A purpley taupey brown
  • I like this for a crease colour
  • Could also be used as a very subtle outer corner shadow


#329

  • VERY pigmented
  • I’ve been using this for outer corner
  • A bit hard to blend. If too much shadow is used it can look patchy when blended


Overview

In general, after using these shadows for about a month, I think I’ve gotten a good grasp on which ones I like and which ones I don’t. My favourite is #397 and my least favourite is #337. I would say that overall I am happy with these shadows, but they were a bit over-hyped for me. I think it depends the colour you get as I found that different colours had a different formulation. I would also say that my Urban Decay Naked 3 palette is more blendable than these ones in general. With that said though, I would be interested in trying more of these out!

Thanks so much for reading! Hope you have a wonderful day!

Follow on Bloglovin

Continue Reading

Tartelette Amazonian Clay Matte Eyeshadow Palette- Overview, Swatches, and Dilemma?!

*Purchased

I come to you today with a beautiful release from Tarte…and a dilemma!

I’ll get into the dilemma later in the post though. Today I’ll be talking about the new Tartelette Matte Eyeshadow palette by Tarte. I was able to get a hold of it before it was released on Sephora through the VIB/VIB Rouge early access. I was also able to use my VIB coupon (which I told myself I wouldn’t use, whoops) on this because it was over $50. I bought this online and even with the shipping, tax, and duty, it was less than if I had bought it in store.

I picked this up because I felt that it would fill a void in my makeup collection (how dramatic!). The only large palette I have is the Naked 3 (which I love!) but I don’t have many matte colours at all. When I saw this palette was being released, I just had to jump on it.

The case is gorgeous and substantial. It’s all chrome, which made it a bit hard to photograph.

There are 12 eyeshadows in the palette and all of them are matte. When swatching, each of them felt buttery and easy to blend. I’ve heard from other reviews that if you blend too much it can start to look muddy. I’ve personally only used this palette once so far, so I can’t really atest to those claims.

The photo above is taken with flash and I believe that most of these look pretty true to colour. The photo below is in natural light (where you can see my phone case in the mirror haha).

I know a lot of people had mixed opinions on the names. I personally really love the names of the colours. I think they are very positive and uplifting. 🙂 One thing that hardcore ‘tartelettes’ mentioned about this palette is that Tarte did away with the plastic film with the names on it and instead printed them on the palette. This is my first tarte palette so I really didn’t notice the change. :p

Here are the swatches from the palette, from top left to bottom right:

Free Spirit – Force of Nature – Dreamer – Multi-Tasker
Caregiver – Natural Beauty – Best Friend – Bombshell
Super Mom – Wanderer – Power Player – Fashionista
This ain’t no Urban Decay Vice palette which is what I was looking for. All colours are very wearable and neutral. I would say you could make many many different looks with this one palette. One thing that I was surprised when I received this palette was the size. It’s about the size of a CD case. Here it is in comparison to my Naked 3:

So now the dilemma i’ve been facing. All in all I love the palette. They are all colours I would use thoroughly. The one thing that I noticed with this palette is the smell. I noticed it the first time I used it. The colours smell almost rotten if that makes sense. Just really really nasty. I was so disappointed when I found this out and haven’t used this palette since. :/ I have no idea if this is just the scent of the palette or if I just got a bad one.

The problem is that I can’t find this palette ANYWHERE. I’ve checked 3 Sephoras and no go. I’m hoping I can find one store even with a tester as I can’t even find one with that. Since this palette is so new, there are not many reviews out about it. All the ones I’ve seen though have not mentioned a nasty smell or a scent. What I’m planning to do is try my best to find one so I can see if they all smell like this or if I just got a bad one. If they are all like this, unfortunately that will be a deal breaker and I’ll return it. I’ll update this post when I can find out more!

It really sucks because I was looking forward to this palette and it’s gone unused. 🙁 Hopefully I just got a bad one and can exchange it for another one.

Even with the few negative thoughts, I hope this post will be helpful to those looking for swatches and such. Thanks for reading! Hope you have an awesome day!

UPDATE: So after visiting / calling like, 6 Sephoras I FINALLY found one that had both a tester and new ones that I could exchange. When I smelt the sample, it didn’t smell at all. Unfortunately though, when I smelt the new one, it was the exact same smell as mine (aka nasty). The associate who was helping me said that since Tarte usually does all natural products, sometimes they can smell ‘off’. Another associate likened it to ‘new car smell’. Sadly it was still a deal breaker for me. It’s one of those things where once you know about it, you can’t go back. :/ From what I saw, I guess when you start to use it, it looses the scent. But I just couldn’t do it. :/ The palette wasn’t cheap, so why would I have something that I would continue to neurotically smell? I ended up returning it to get my money back. I’m planning on creating my own matte palette from Inglot so that should be fun. 🙂 

Follow on Bloglovin

Continue Reading

Review: NARS Pure Radiant Tinted Moisturizer

Hello! Hope you are enjoying your weekend!

I’ve been sitting on this review for so long, and I’m glad to be finally doing it! I bought this product back in the winter, and it has been my go-to foundation since.

Overview:

I like it, but I wouldn’t say holy grail status.

Price:

$49 CAD at Sephora (wow just realized how expensive this was!!)

Rating:

7 / 10

Would I Buy Again?

Yes, I would buy it again, but not before trying other products.

Rambling Review

I was looking into tinted moisturizers for awhile, and I remember I was looking at this one and the Laura Mercier one. When I went into Sephora I asked the associate for help and she recommended the NARS one just because of the buildable coverage. So meh, what the heck, I bought it.

I was surprised that the associate offered me the second lightest colour. She said that it definitely deepens after wearing, so what the heck. The colour I got was Alaska (Light 2).

After wearing it, I understand why she chose this shade for me!! I noticed it definitely oxidizes. The one thing I don’t really like about this foundation is that it turns out a bit orangey. It has very yellow undertones.

My pictures aren’t the best, but they show different lighting I guess?

The formulation is much more liquidy than I was expecting. I noticed that the best way to apply this was a patting motion with my fingers. Even my best brushes ended up making it look a little streaky. This is also a foundation that should be set with powder after application. Since it’s so light and liquidy, the power adds a little structure to it.

One thing I want to note is the smell! I didn’t expect it to be so pleasant! It has a lemony smell which sounds really odd, but most foundations I’ve smelled have been kinda toxicy or no scent. So this was definitely interesting.

I’m not sure if I would re-purchase this right away due to the price and orangey-ness, but I would say it’s a solid foundation (if the colours work for you).

Thanks for reading! Hope you have a great day!

Follow on Bloglovin

Continue Reading

Review: Benefit They’re Real Push-Up Liner

I’ve been so anxious to put up this review! Here it is coming attcha.

Unless you’ve been living under a rock (with no internet access), you’ve probably heard about the much much MUCH hyped new gel eyeliner from Benefit. Thanks to Janine from beautygeeks and Benefit Cosmetics I got to try out this liner before it hit stores last week. You can check out Janine’s review plus others who were lucky enough to get chosen for this campaign here.

Overview:

I think I might have found my new go-to eyeliner. 😀

Price:

This was kindly provided by Janine from beautygeeks and Benefit Cosmetics.

It can be found at Sephora, Shoppers Drug Mart/ Murale for $29 CAD

Rating:

9 / 10

Would I Buy Again?

Yes I would buy this liner again.

Rambling Review

Eyeliner is one of my favourite makeup items. I feel my eyes look so dead without it, so it’s usually my go-to. When I got picked for this campaign I was beyond excited. I wouldn’t say I’m usually on the forefront of the new makeup horizon, so I was excited to try something that I’ve heard so much about (plus my Stila stay all day liquid eyeliner was running out).

The eyeliner comes with a little orange nub thing I guess to keep the eyeliner from drying out.

As you can see from the picture, the tip is the most revolutionary part of this eyeliner. Usually when applying gel eyeliner you need an angled brush but not with this one. You click up the bottom of the pen and the gel is pushed up the tip. When I first opened this I got scared that I got a dud cause it probably took me 50 clicks to start getting product out. The relief I felt once I got the product flowing….dear jebus.

Along with the actual product, they provide you with a tip sheet to achieving the perfect liner. One of the tips they provide is to do a stamping motion on your lashline to keep the line steady. I found the issue with this trick is that it never really ‘stamped’ the product out. Since ain’t nobody got time for that, I just ended up applying this I would usually with short dragging motions.

And here is my result!

It gives such a nice matte black line which I love. It’s funny, I find that this liner looks better and better throughout the day. The lines soften (but don’t smudge) which creates a really smooth intense eyeliner look.

I also tried doing a little baby wing which will need more practice. :p

When taking this off, I would say use a strong waterproof makeup remover. I found that I needed to use two cotton pads instead of my usual one when removing.

All in all, I’m really impressed by this liner. I would say to do the dramatic super duper amazing wings take practice, but that’s just liner in general. If you like the look and feel of gel eyeliner, I would definitely recommend trying this out!

Thanks for reading! Hope you have a great day!

Follow on Bloglovin

Continue Reading

Review: Nair Candy Apple Sugar Wax

Hello there!

Here with a review!

First off, I just wanted to say thank you to ChickAdvisor, as they sent this to me to review as part of their Product Review Club. (And a double thanks for extending the deadline for me. Hair removal is the last thing you’re thinking about when you’re in bed with the flu).

If you’d like to learn more about the Product Review Club (I highly recommend it), check out ChickAdvisor here.

On with the review.

Overview:

Time consuming but very effective way to remove hair.

Price:

This was given to be by the ChickAdvisor Product Review Club, I’m not too sure what the retail price is.

Rating:

6.5 / 10

Would I Buy Again?

I’m on the fence about it. I’m going to keep on trying it out until I perfect my technique! 🙂

Rambling Review

This is the first time I have tried using hot wax in spatula and tub form. I purchased a Veet electric hot wax product which wasn’t all that great, so I wasn’t sure what to expect from this one. Just a bit of background, I usually shave my legs but wax my underarms using cold wax strips.

The kit comes with a little tongue depressor stick, re-usable fabric sheets, instructions, and the tub of wax. Something I really liked was that the sheets are re-usable, you just need a bit of water to remove the wax from them.

The wax was super easy to heat up, you just pop it in the microwave for 30 seconds. It warmed up evenly and at the perfect temperature. The smell is quite pleasant (candy apple, yum) and the consistency was great. Now I was ready to go. I started with my legs and then I moved onto my underarms.

The first thing I noticed was it was a little awkward to get the right amount of wax on my legs. When I ripped off the sheets, there was still a bit of wax left over.

My fingers were getting sticky and making sure I didn’t mess up the wax everywhere on my carpet (bad idea doing it in my carpeted room probably…) was a bit of a challenge.

What I noticed though was that my legs and underarms ended up really really smooth. I’m very happy with the results and I can guess that this would last longer than shaving (they claim it lasts up to 4 weeks).

After finishing, I was sorta sticky all over. I was not planning to take a shower, so I had to run a towel under water to remove the wax. The good thing was it was very easy to remove. Other cold wax products I have dealt with have been a hassle to get the excess wax off. One thing I did notice is that it turned my fingers red after washing the fabric strips off!

It’s not super stained, but definitely noticeable.

My tips for using hot wax:

  • Make sure you have ample time on your hands. I would consider this a much lengthier process than shaving
  • Do this right before you are planning to take a shower. Clean up will be so much easier. (They recommend you don’t use this within an hour of taking a shower because your skin may be still a little wet, making the wax less effective)
  • Maybe wear gloves so your hands don’t get stained like mine
  • Use the wooden stick to put on a thin layer of wax. I think I sabotaged myself by using big globs when I could have done enough with just a thin layer.

All in all, I’m excited to try this again. I think with practice and timing, this could be a very good alternative to shaving.

Thanks for reading!

Follow on Bloglovin

Continue Reading